Happy menstrual hygiene day!
What a perfect opportunity to write a post on my nature-loving-lifestyle blog. Because everybody knows of the amount of unnecessary trash that comes with menstrual hygiene. I mean, plastic tampon applicators, double the size of the tampon and everything then wrapped individually in a plastic baggy? Are you kidding me?
Now don’t worry, I will not tell you to sit on a straw bale for 4-8 days. Although I have met some very lovely forest dwelling women who do exactly that and seemed very happy with their practice. I didn’t inquire further at the time, but now I really wish I had. Surely they can’t just sit there the whole time. I have so many questions.
Anyway, I wrote a little tutorial for you today, showing you how to make menstrual pads yourself. But not just any kind of menstrual pad. Its washable and you can store it in a little pouch of your choice AND you need mostly upcycled materials. So this project is SUPER zero waste plastic free gluten free and vegan.
This tutorial is illustrated with photos of my own struggles (helped by my mother, sister and wine) and I hope they give those of you, who tend to excel more in other disciplines, some hope. I learned knitting, crocheting, felting and sewing in school. My mother did all my “homework”. And by that, I mean my mother did ALL the work. Now that I have a partner who can sew better than me, my inner sexist is driving me to change that. So here’s this blog’s first sewing tutorial:
You will need:
- Material
- Thin cotton (an old blouse or pillowcase will do). A pretty pattern can be nice. For a simple fastening pad, you need about 4 hands width of material. For an H-shaped pad you will need about double that.
- A piece of thicker, absorbent material: Molton (baby supplies) or flanell from old shirts or an old bath towel. You need one piece per pad. But if it is thin flanell, I recommend stacking 2-4 pieces and sewing them together at the edges to make a thicker absorbing pad.
- Thread
- Pinning needles
- Scissors
- Snapbuttons, hooks and eyes, or Velcro for fastening.
- Sewing Machine
- Chalk (optional)
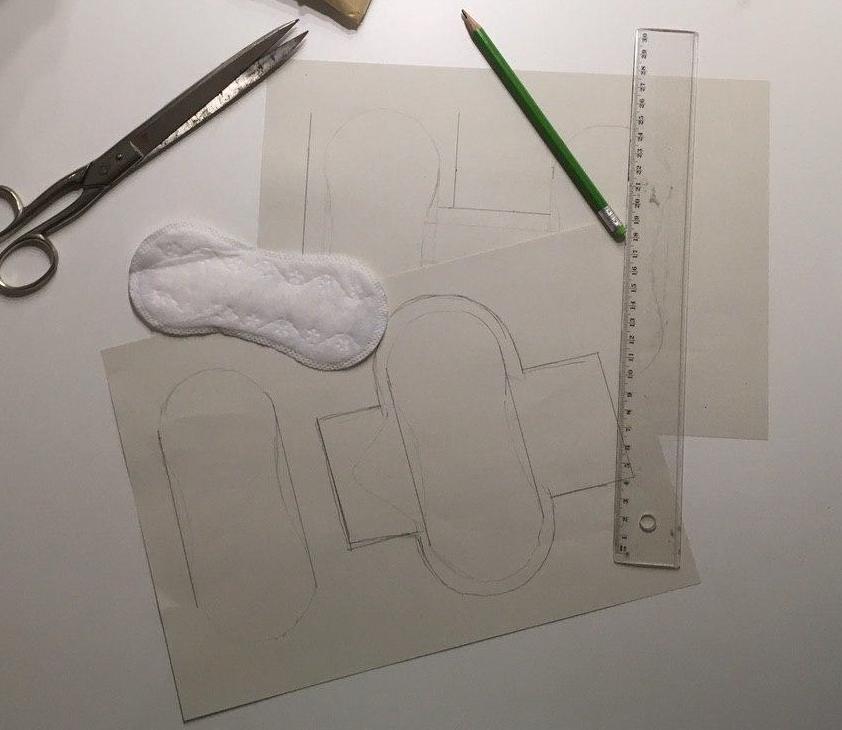
- One of your regular, plastic wrapped, no good, pads in your favourite shape and size. OR just use this pattern I made after I learned from my mistakes.
Let’s get to it!
So I started off by tracing a single use pad on a piece of paper, adding a centimeter seam allowance and created a pattern. But then, as you will see in the pictures, the end products didn’t turn out perfect: the bridge part on the H-shaped pad was too short. So the next day, I made a pattern that accounts for all the seam allowance extras. You can download it and just use that. Or try your hand at tracing your favourite shape and size single use pad.
1. Cutting Out The Pieces
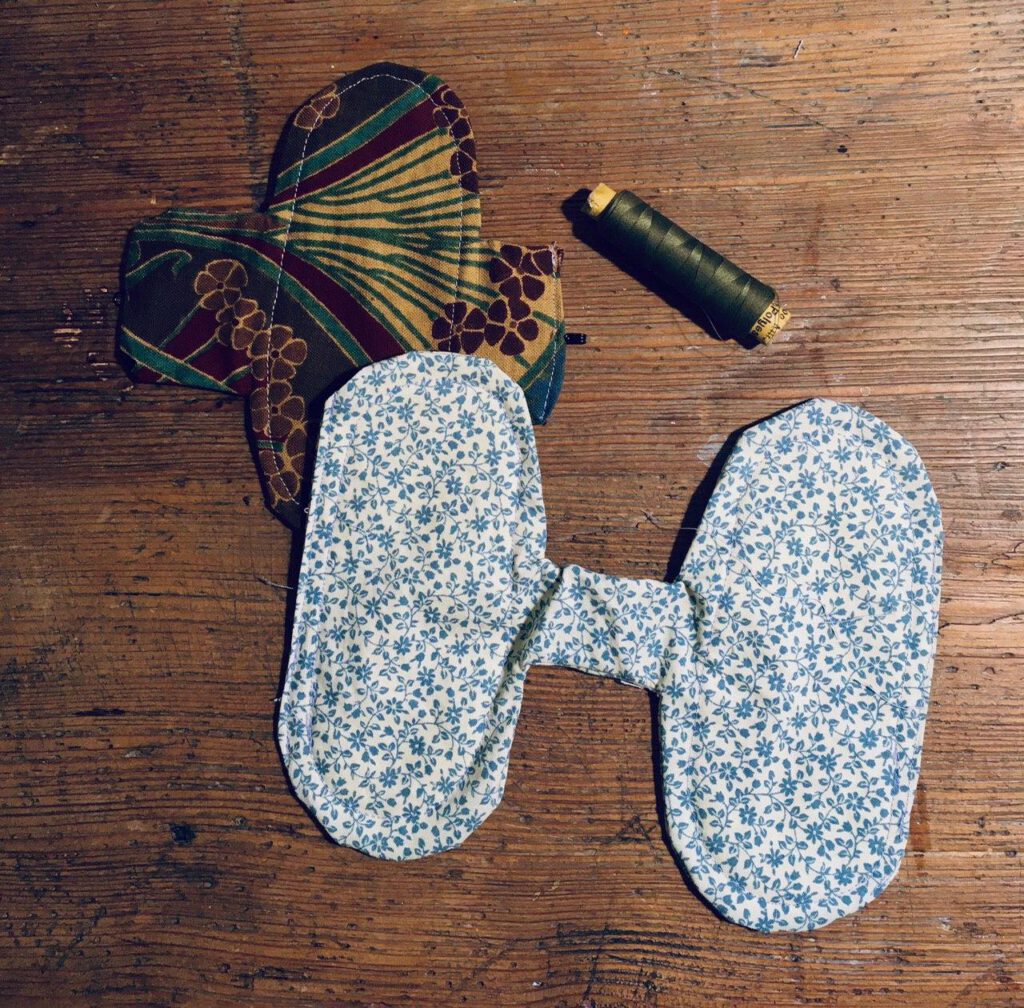
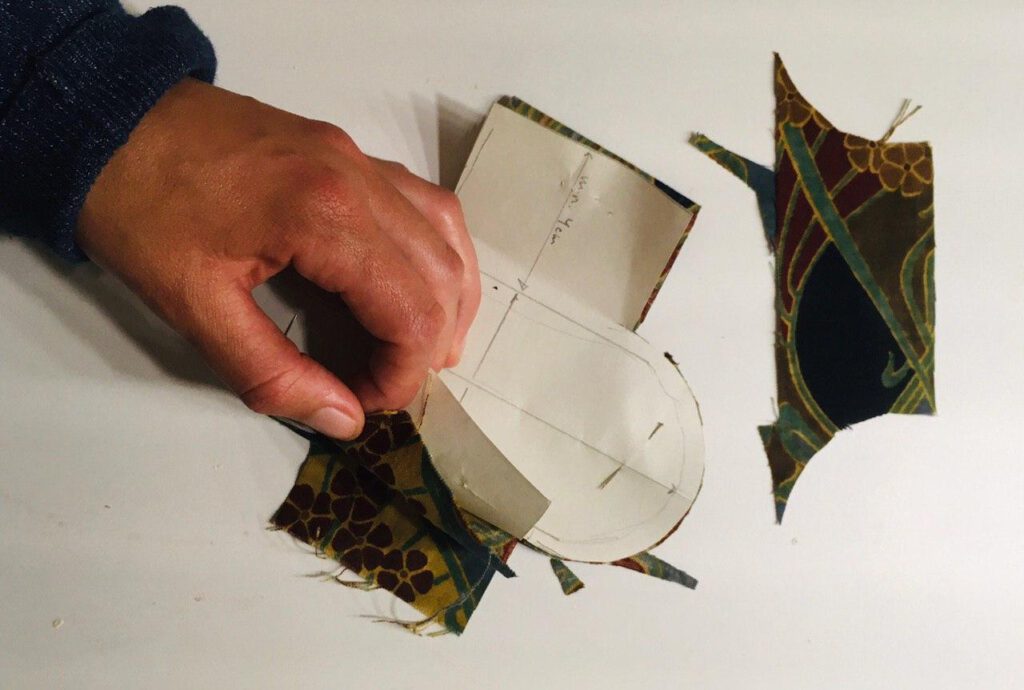
For the outside part, double fold your cotton material, pretty side in, cut out your pattern (blue on the printout) and pin it onto your folded material. If you are making multiple pads and want to save time, you can stack your double folded materials and pin everything together.
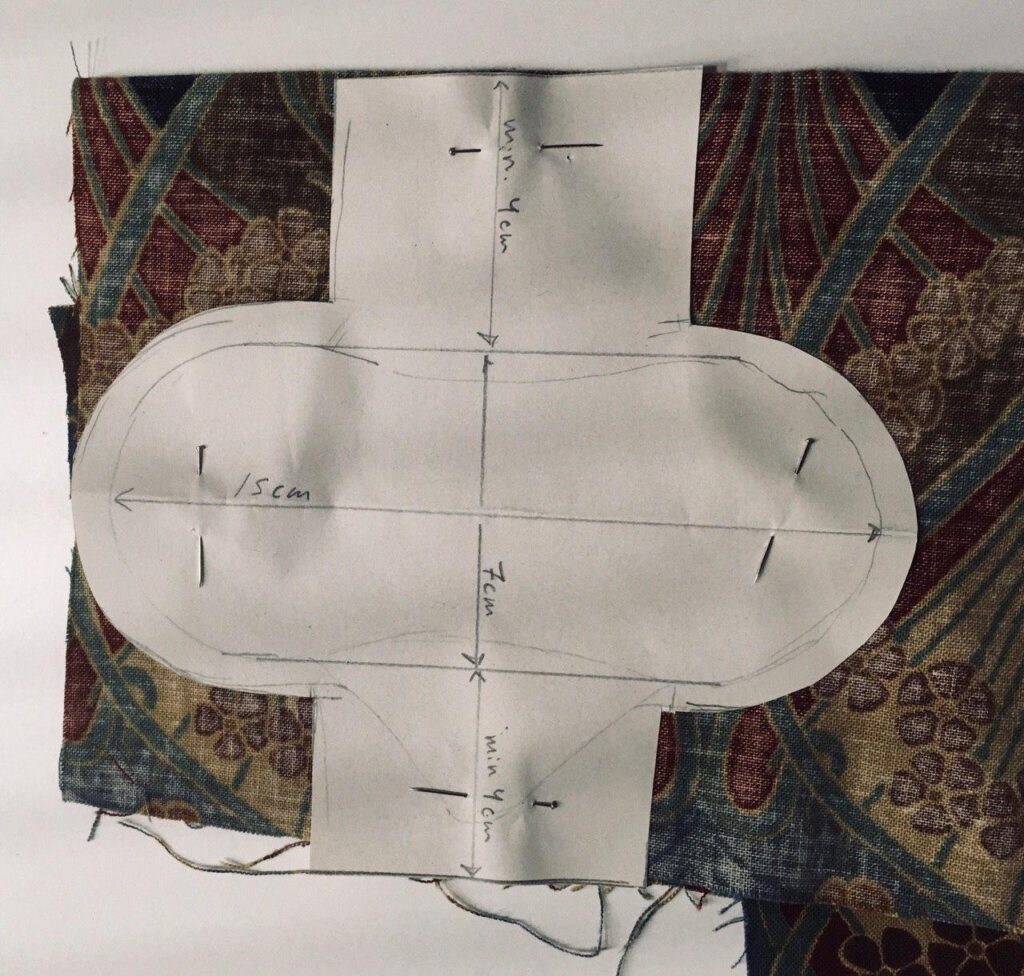
Trace your pattern with chalk, or cut along the pattern straight away (use more pins for precision in that case).
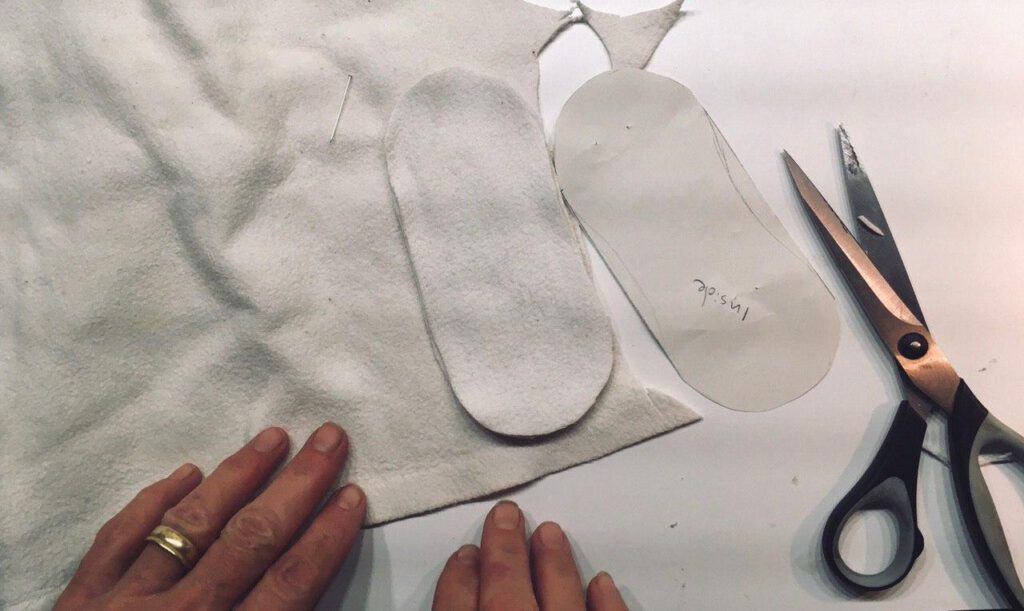
For the inside part (red on the printout) you only need to double or triple your material if you want the “sponge” part to be thicker. It might be a good idea if you are using a thin flannel. I used Molton that came from a baby diaper station, designed to suck up all the baby fluids, so I decided one layer is enough. Its just about finding a balance between security and not wanting the feeling of wearing a diaper, I guess.
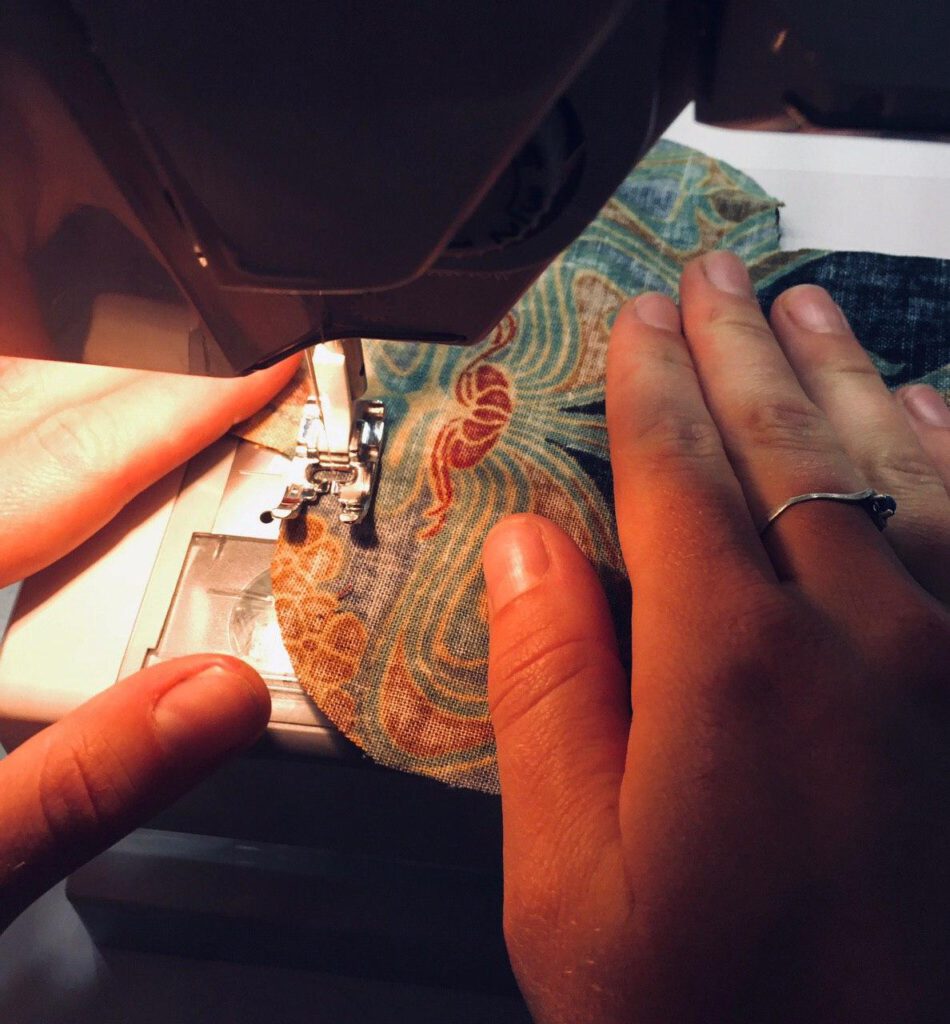
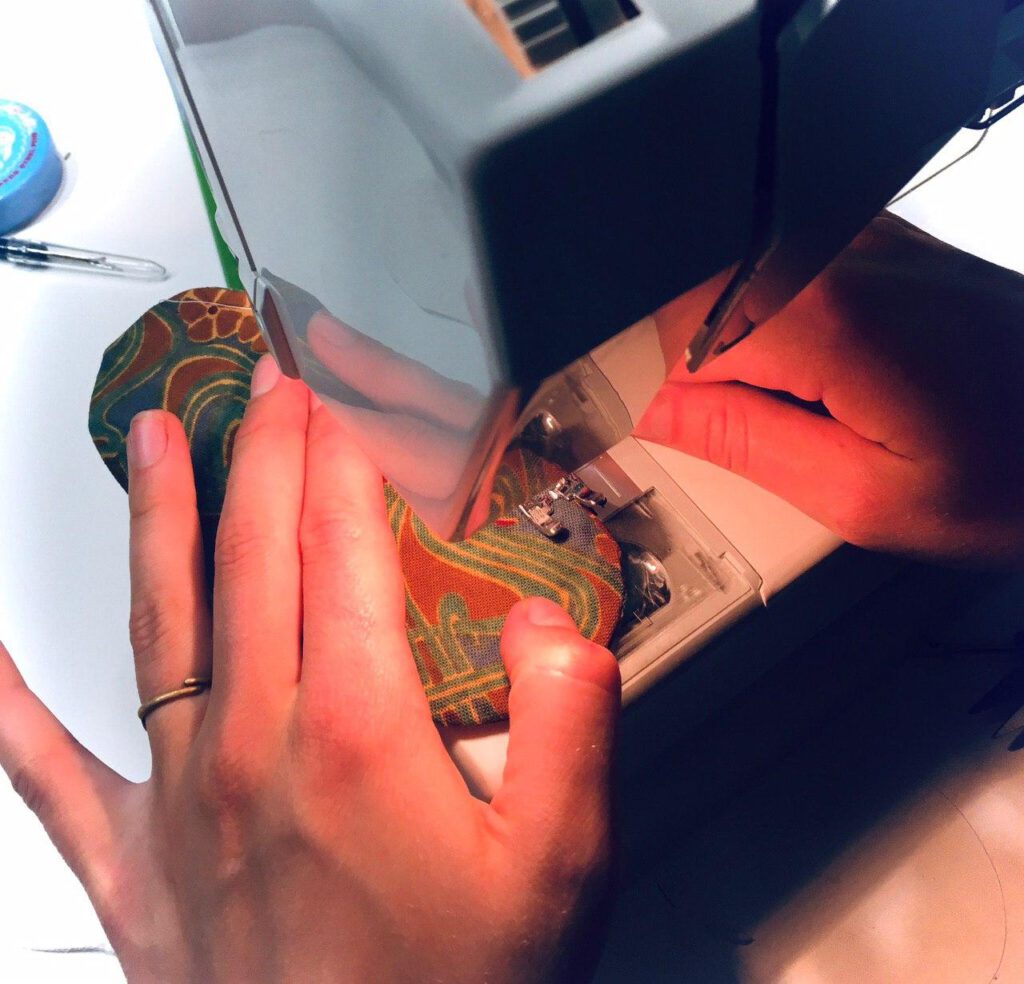
2. Sewing
Remove the pattern but keep your material pinned in the position you cut it out in.
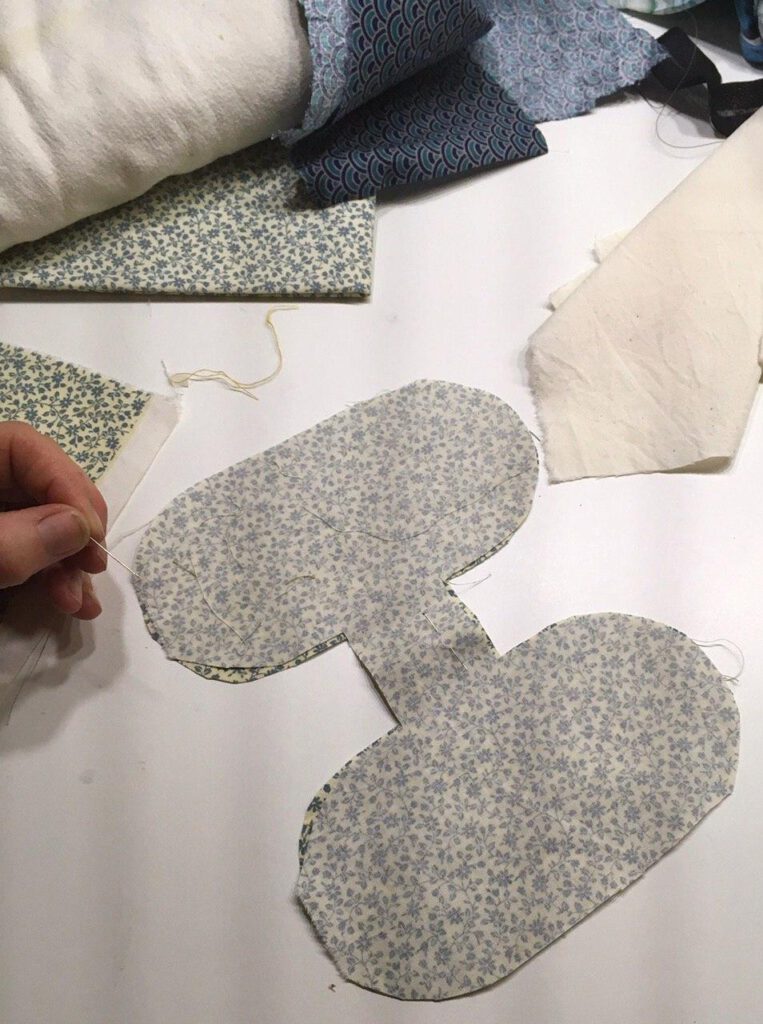
Sew along the outside of your whole pad, leaving out a hole to insert your inner pieces later. The best hole-place on the single pad is the end of one of the fastening flaps. On the H-shape, a gap in the straight edges on the outsides, or omitting one side of the bridge, is best.
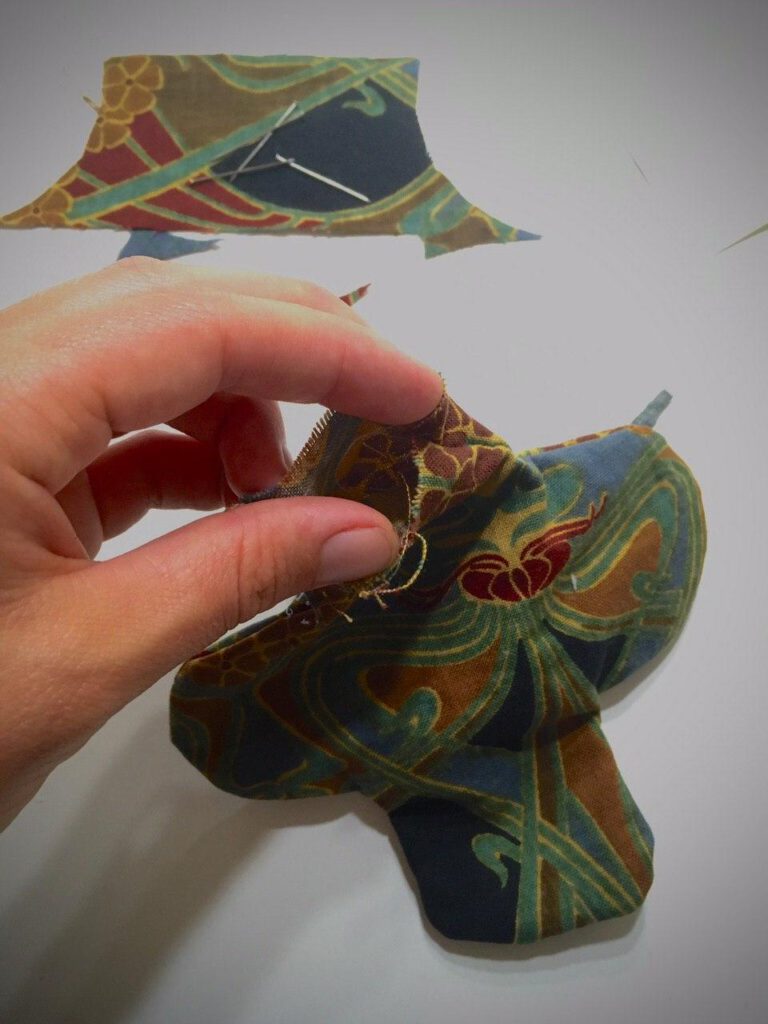
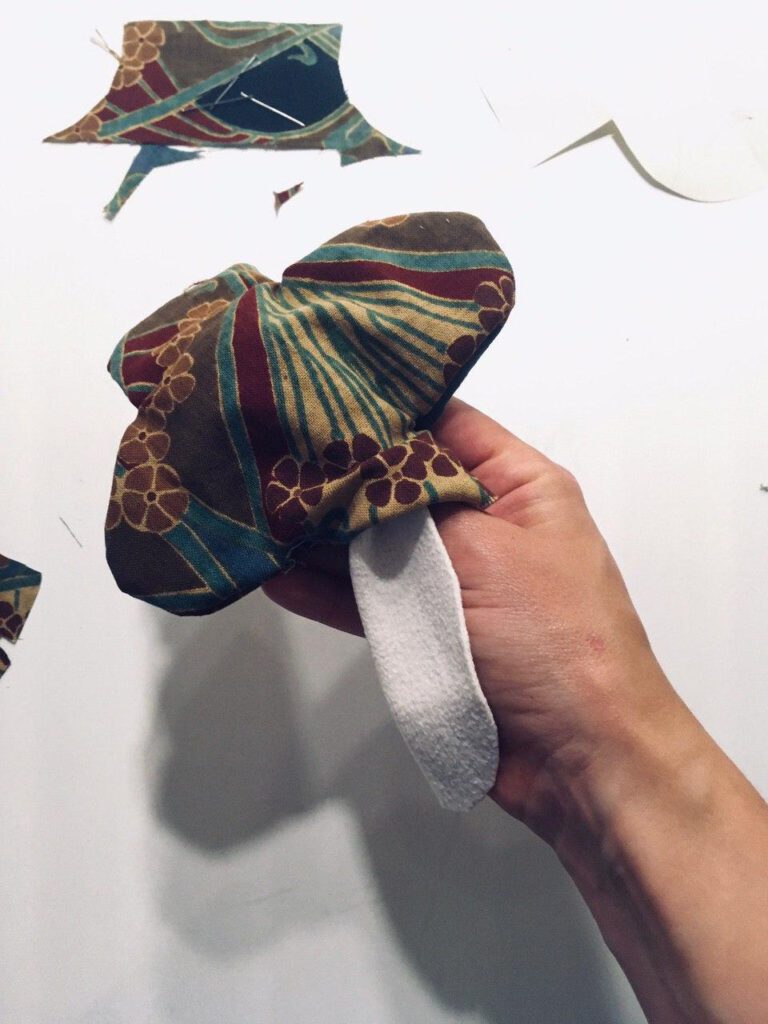
Turn your pads right side out and wiggle your inner pads through the holes you omitted while sewing. Flatten them out and make them fit nice and snug in its casing. You can use a hot iron to make everything stay, but I found it not really necessary.
Fold the edges of the holes in the casing inwards and sew them up.
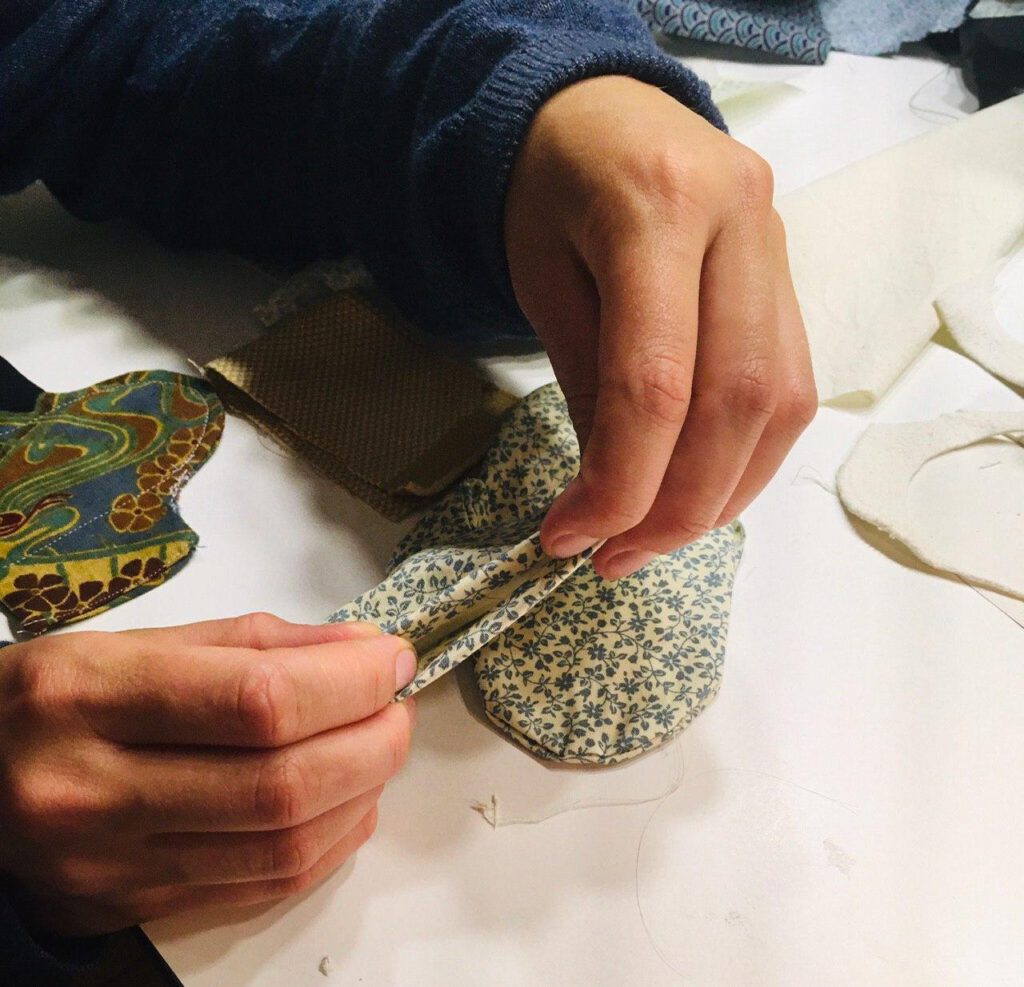
Finally, sew once around the pad part, to secure the inner pad in place.
On the single pad, attach your fasteners to the flaps.
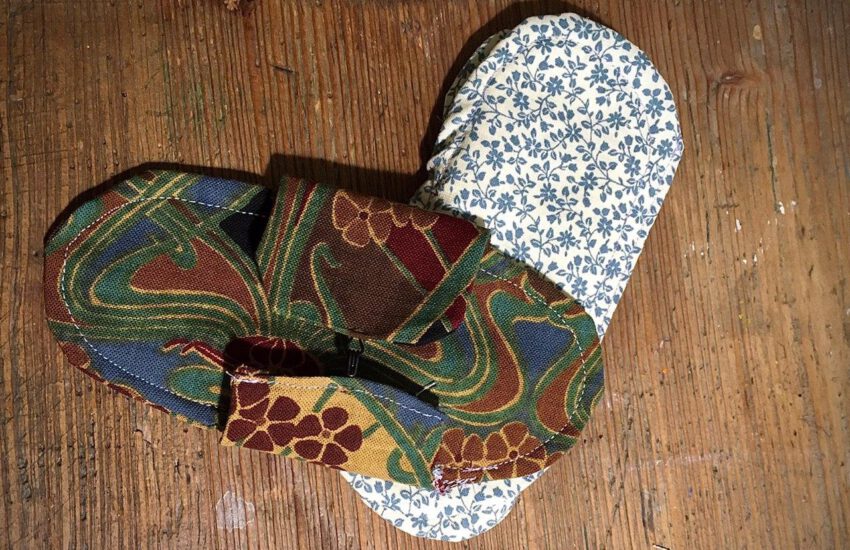
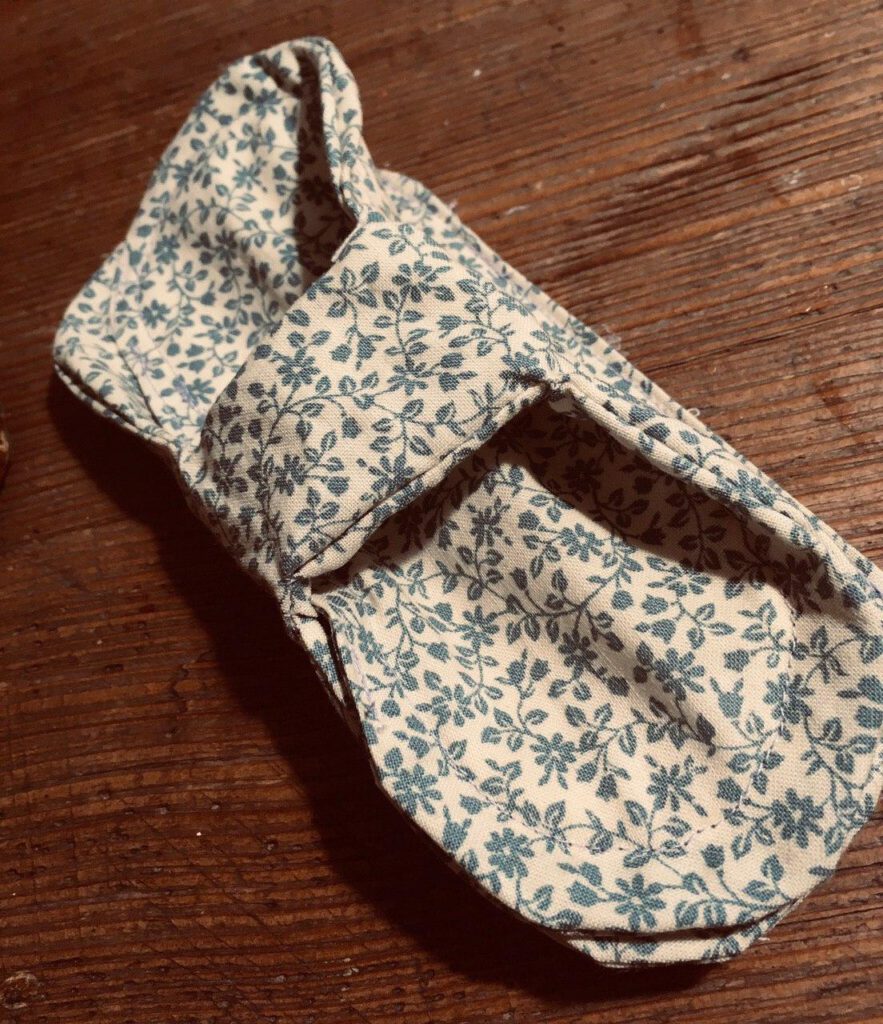
And you’re DONE!

And the bridge for the H-shape was also too short. It should have been the width of the inner pad AFTER adding the seam allowance.
3. Using Them
So how do they work? Just like store bought plastic ones, except these don’t stick.
The single pad:
Place the pad on the inlay of your panties, wrap the securing flaps down, and fasten on the outside.
H-shaped pad:
Place one pad on the inlay of your panties, wrap the other one down and up again, so the bridge is on the outside and the pads are stacked on top of each other on the inside of your panties.
These pads have no plastic layer against leakage so check them when you go to the bathroom. Bring a wet bag with you to transport used pads back home if needed. The upside to the missing plastic is the whole area is more breathable, which hinders bacteria from having a good time in your pants.
Wash
After use, thoroughly rinse in COLD water and then just add to your regular laundry. If you are worried about infection, wash them hotter than 42°C (108°F). But the initial rinse must be cold in any case.
I hope you like the pads as much as I do. If you hate sewing, you might be able to buy very expensive material reusable pads online or in some health-food stores. This project will take about 1,5 to 2 hours if you are a clumsy sewer like me.
If you love making these, make tons of them and give them to friends, or even better, send them to disadvantaged, non-emancipated communities around the world or give them to your local homeless woman.
Menstrual hygiene problems still hold back so many women and girls today, hampering their education. And one of the best things to do for the health of our planet, is educating women.
Thank you SO MUCH for this informative blog. I will pass it along to women I know that are 1) in the right age group 2) can sew. That’s plenty of women! It would be great if a lot of women could find the way to avoiding the amazing waste that you document in your blog. Thanks again!
Thank you Nina! And thank you for passing it along. Ability to sew isn’t even a necessity. It’s THAT easy. Although access to a sewing machine is a requirement. At least I do not have the patience to sew this by hand.
I’ve been looking online at reusable pads and the prices were keeping me back. Then I remembered I can sew lol. Thank you for this tutorial! I got plenty of scrap fabric that will make some cute pads. I’m gonna try it soon.
Oh yay! I’m so happy. I still have the pads I sewed for this post and they still work and look fine 🙂